(ご注意)LINERサポートチームはSalesforce標準のフロー機能の設定ご支援はできません。
お客さま組織固有の条件を組む必要がある場合は、Salesforceサポートへお問い合わせをお願いいたします。
目次
モバイル版通知設定の事前準備
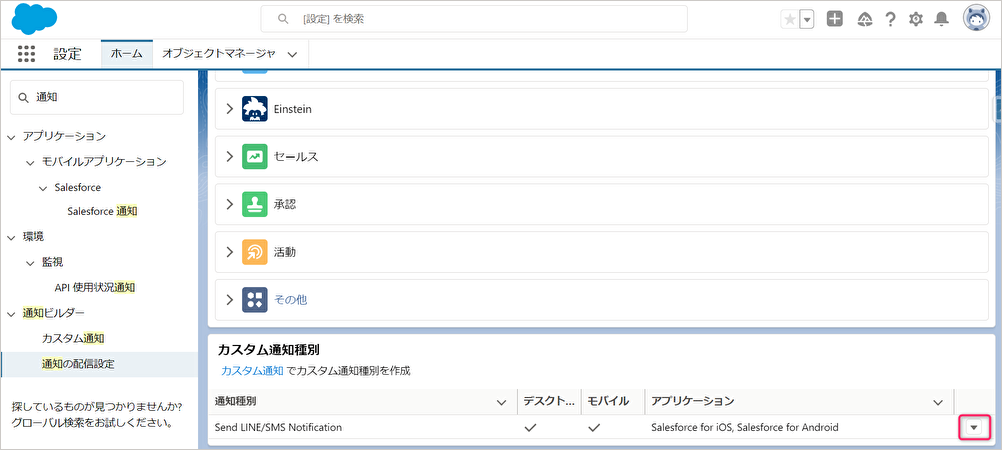
1. Salesforce[設定]-[通知の配信設定]
通知種別の「Send LINE/SMS Notification」にある▽から「編集」を選択 します。
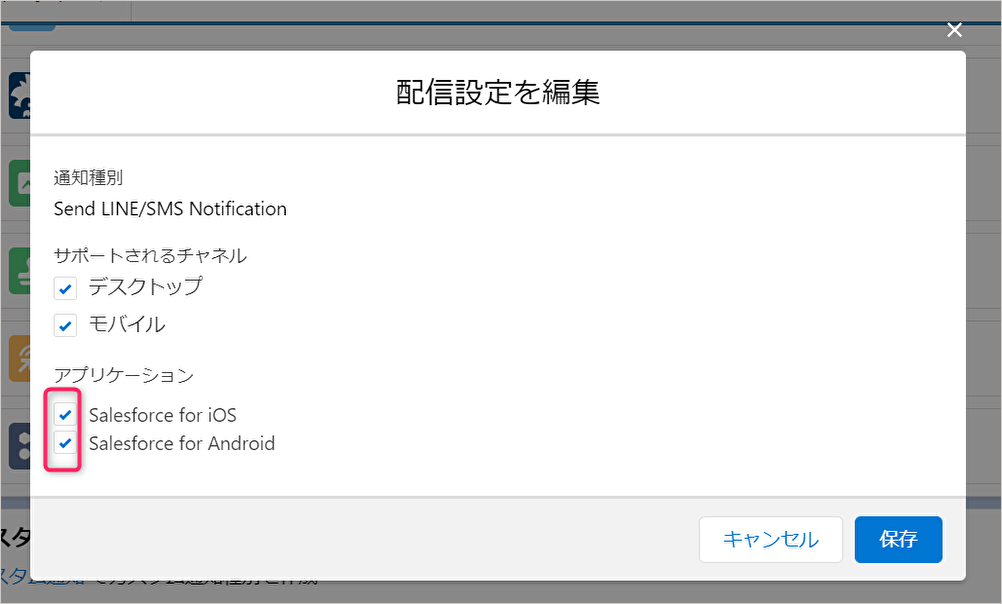
2. 使用するモバイルアプリケーションにチェックを入れ保存をします。
※アプリケーションが表示されない場合
一度モバイル版で該当のSalesforce環境にログインした際にアプリケーションが表示されます。
推奨:定期通知設定(LINE/SMS共通)
Line Notification Queueレコードの作成を起点として、通知を受信する設定となります。
※最短2分間隔で通知を受け取ることができます。リアルタイム通知ではありません。
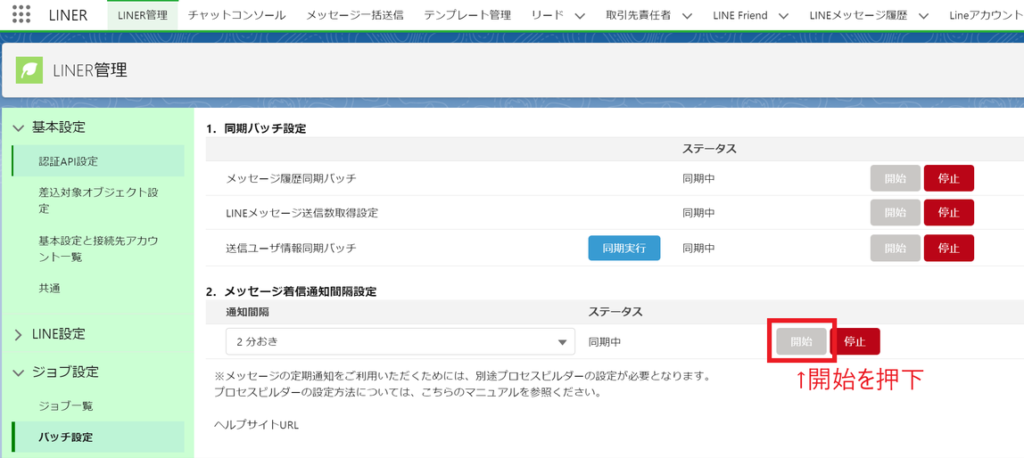
1. [LINER管理]-[ジョブ設定]-[バッチ設定]にて「2.メッセージ着信通知間隔設定」の[開始]をクリック
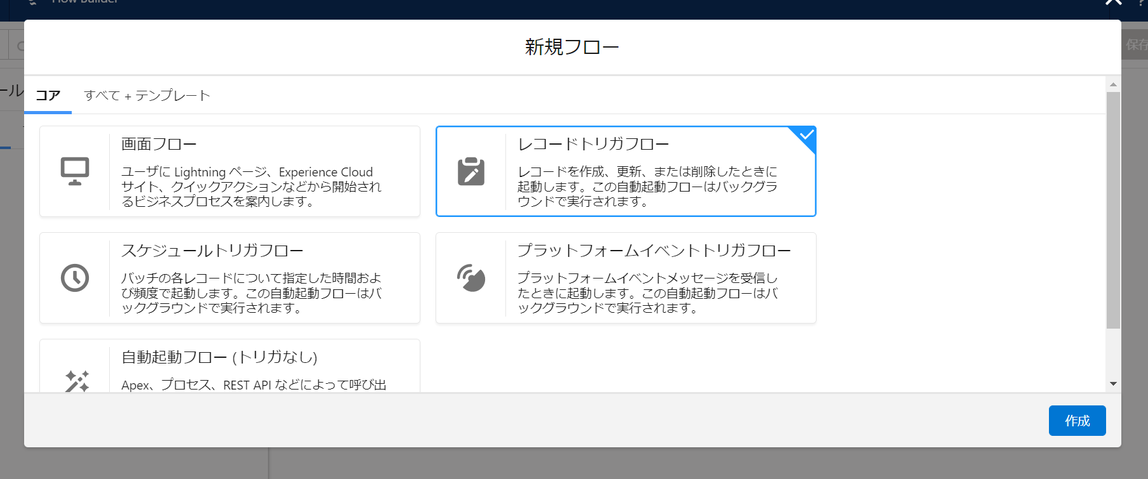
2. Salesforce[設定]-[フロー]にて「新規フロー」をクリック

3. 「レコードトリガーフロー」を選択して、「作成」をクリック
4. 下記のように設定をして、「完了」をクリック
| 設定 | 設定値 |
| オブジェクト | Line Notificatiton Queue |
| トリガを設定 | レコードが作成された |
| エントリ条件を設定 | すべての条件に一致(AND) |
| anslut__Line_friend__c | null – False |
| anslut__Line_title__c | null – False |
| anslut__Line_message__c | null – False |
| フローを最適化 | アクションと関連レコード |
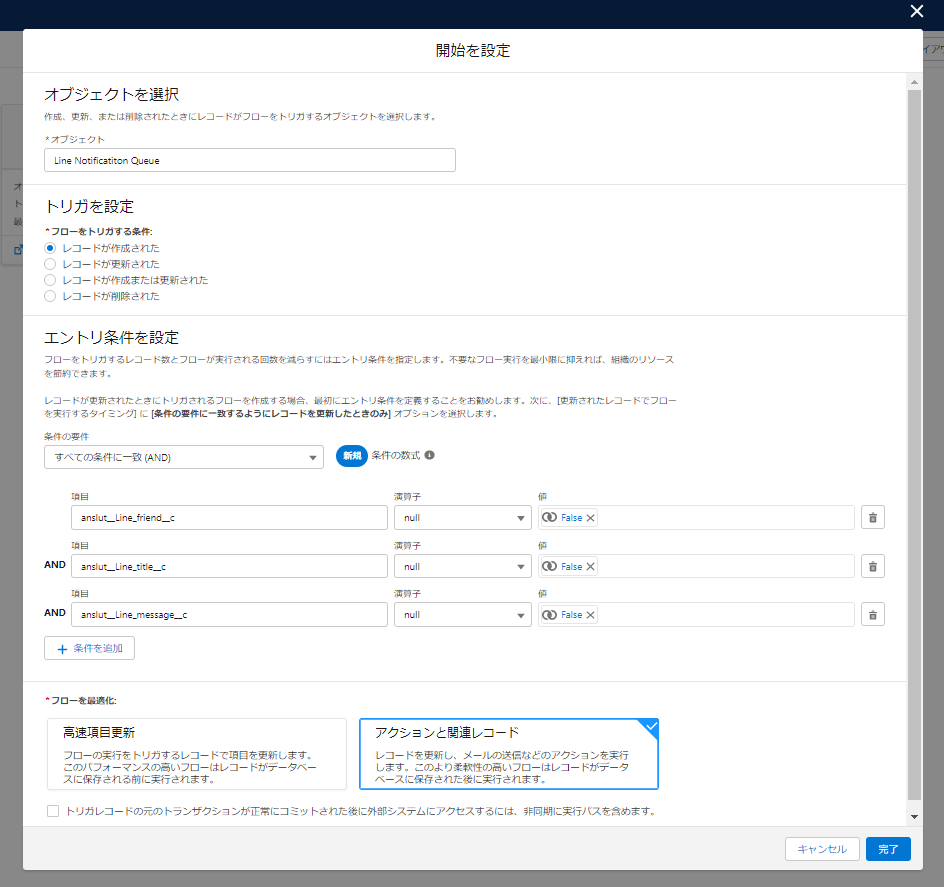
※以下、条件のクローズアップとなります

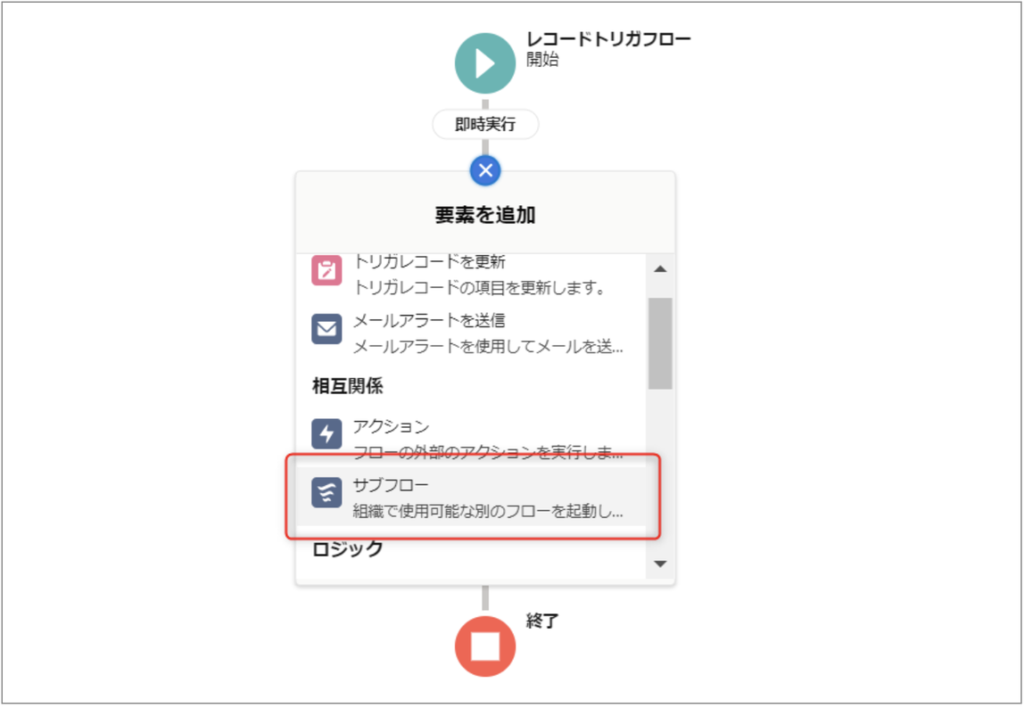
5. [+]ボタンをクリックし、「サブフロー」要素をクリック
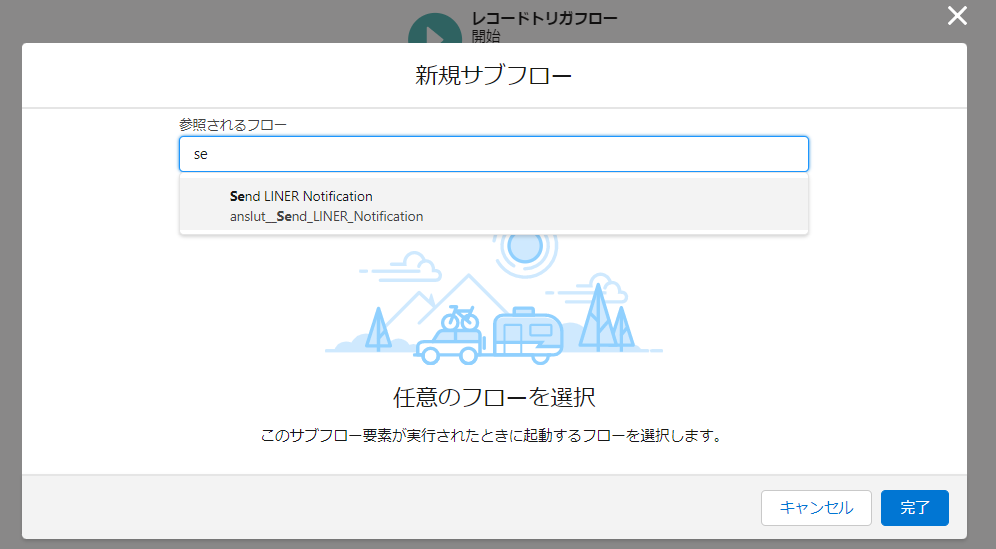
6. 参照されるフローにて Send LINER Notificationフローを検索
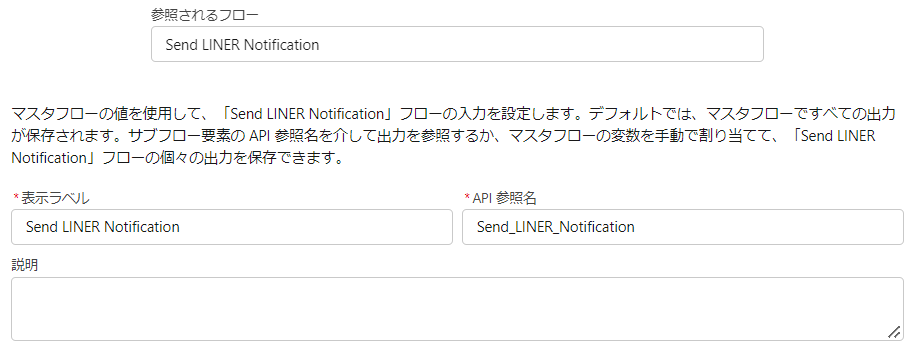
7. 表示ラベルとAPI参照名を任意の値を入力
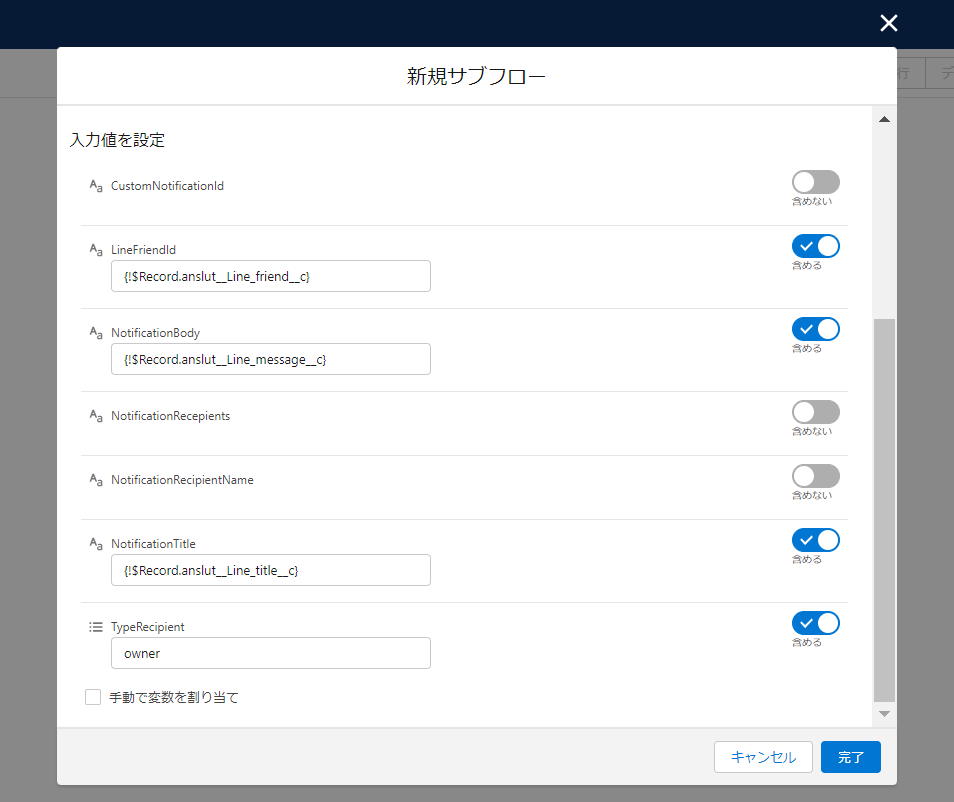
8. 各設定に入力値を設定して、完了をクリック
※サブフローに値を渡すもののみ、「含める」にする
| NO | 設定 | 入力値 | |
| 1 | CustomNotificationId | – | 含めない |
| 2 | LineFriendId | {!$Record.anslut__Line_friend__c} | 含める |
| 3 | NotificationBody | {!$Record.anslut__Line_message__c} | 含める |
| 4 | NotificationRecipients | – | 含めない |
| 5 | NotificationRecipientName | ユーザ名 or グループ名 TypeRecipientがownerの場合は不要 ※ | – |
| 6 | NotificationTitle | {!$Record.anslut__Line_title__c} | 含める |
| 7 | TypeRecipient | owner / user / group ※ | 含める |
5:NotificationRecipientName ※
・ユーザ単位で通知を受け取る場合は、TypeRecipientへuserをセットしユーザ名を入力します。
・グループで通知を受け取る場合はTypeRecipientへgroupをセットし、公開グループのグループ名を入力します。
※事前に公開グループの作成が必要となります。
7:TypeRecipient ※
・owner:レコードの所有者に通知されます
・user:指定したユーザに通知されます
・group:指定した公開グループに通知されます。
※以下は所有者(owner)の場合の設定例:
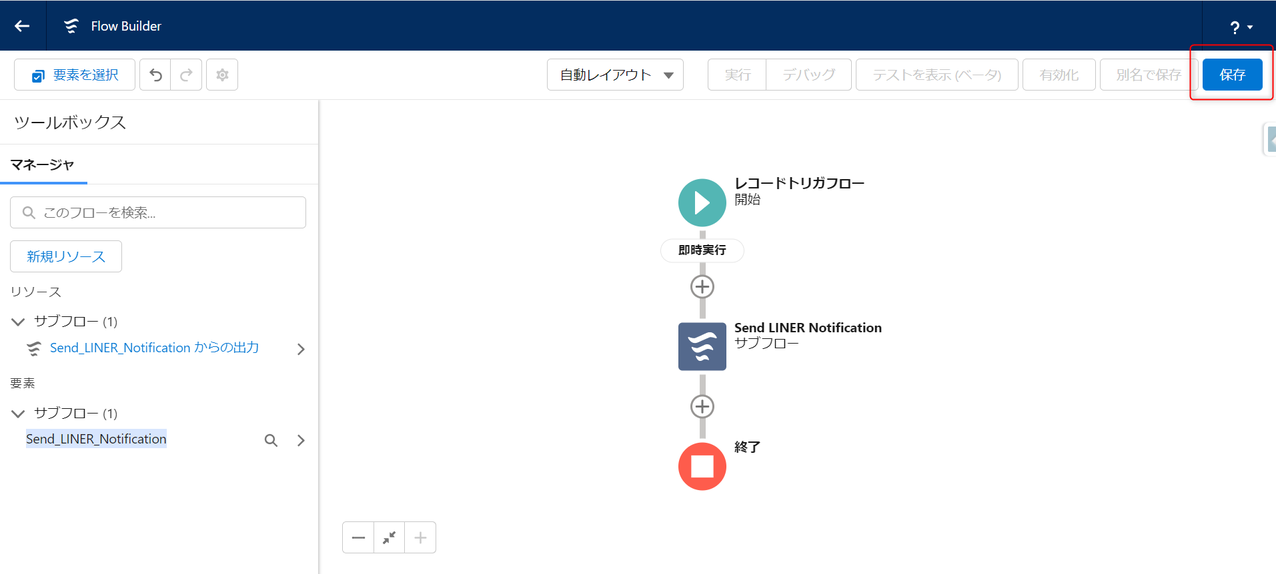
9. 「保存」と有効化を行います。
フローが完成したら右上の[保存]をクリックします
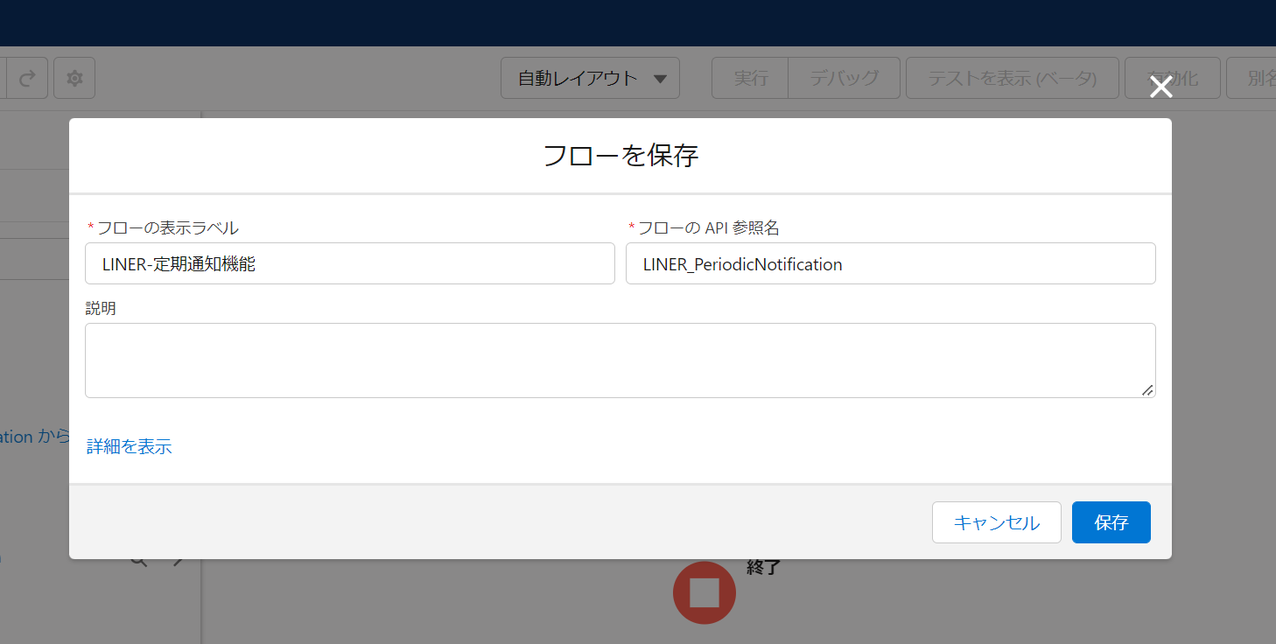
「フローの表示ラベル」と「フローのAPI参照名」に任意の値を入力して[保存]をクリック
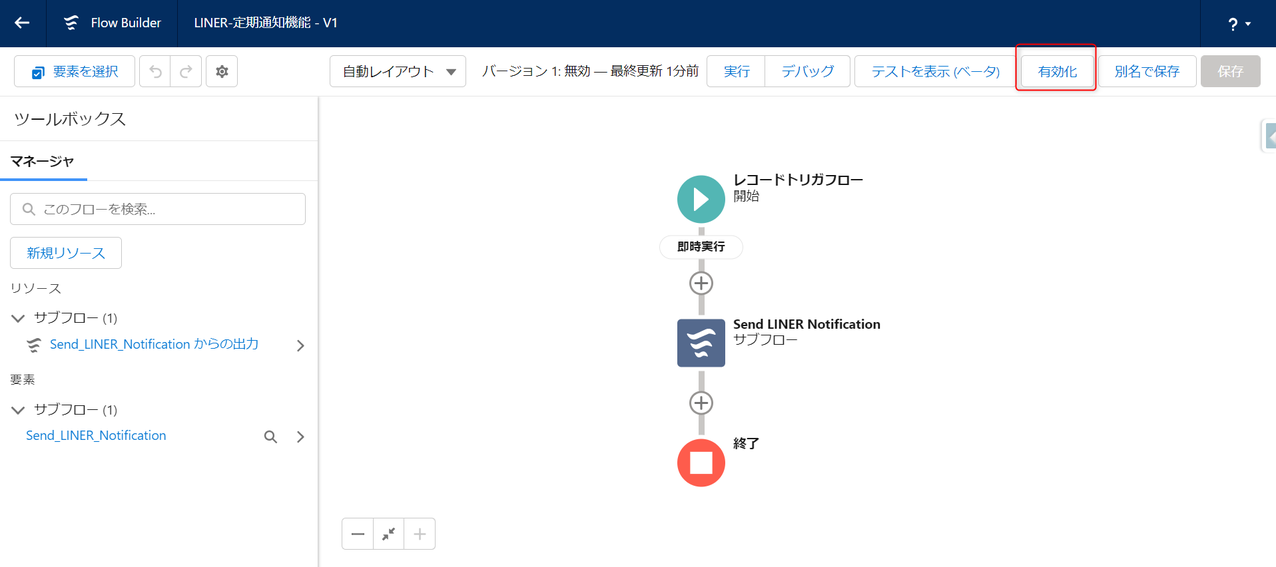
最後に忘れずに[有効化]をクリック
非推奨:リアルタイム通知設定(旧通知設定)/
送信先オブジェクトに設定したオブジェクトのレコード更新をもとに、リアルタイムに通知をする設定です。
※Salesforceを開いているかつユーティリティバーにLine Notificationがある時のみ利用可能な通知設定です
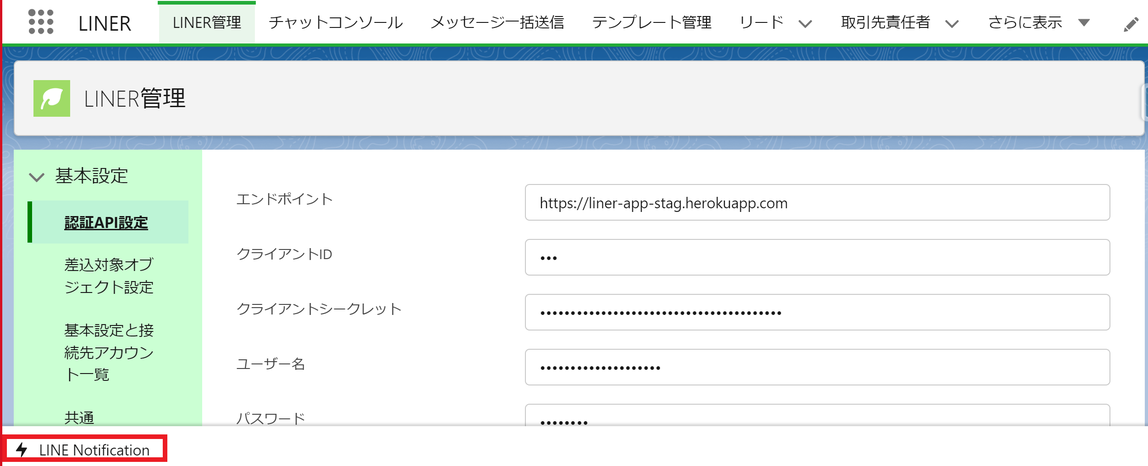
1. Salesforce[設定]-[フロー]にて「新規フロー」をクリック

2. 「レコードトリガーフロー」を選択して、「作成」をクリック
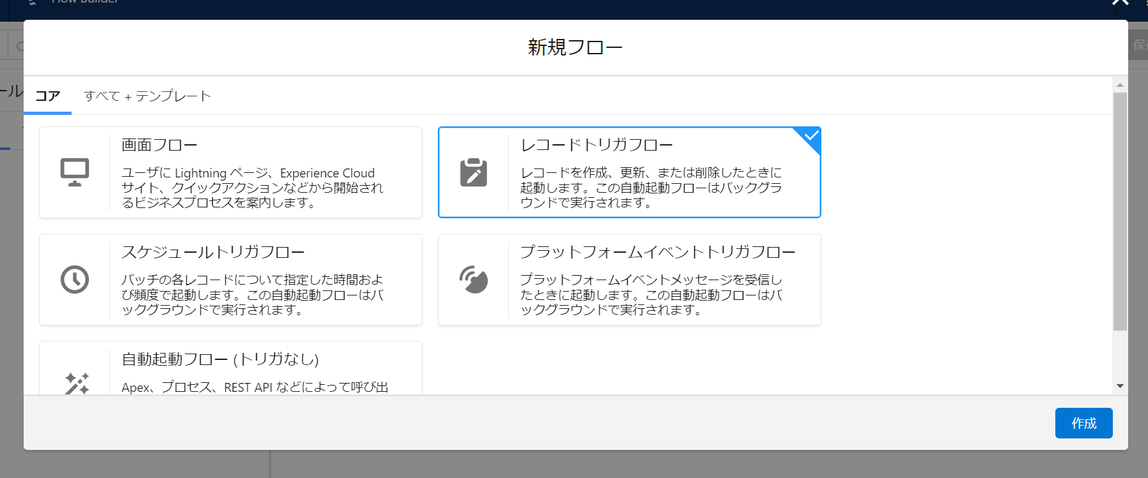
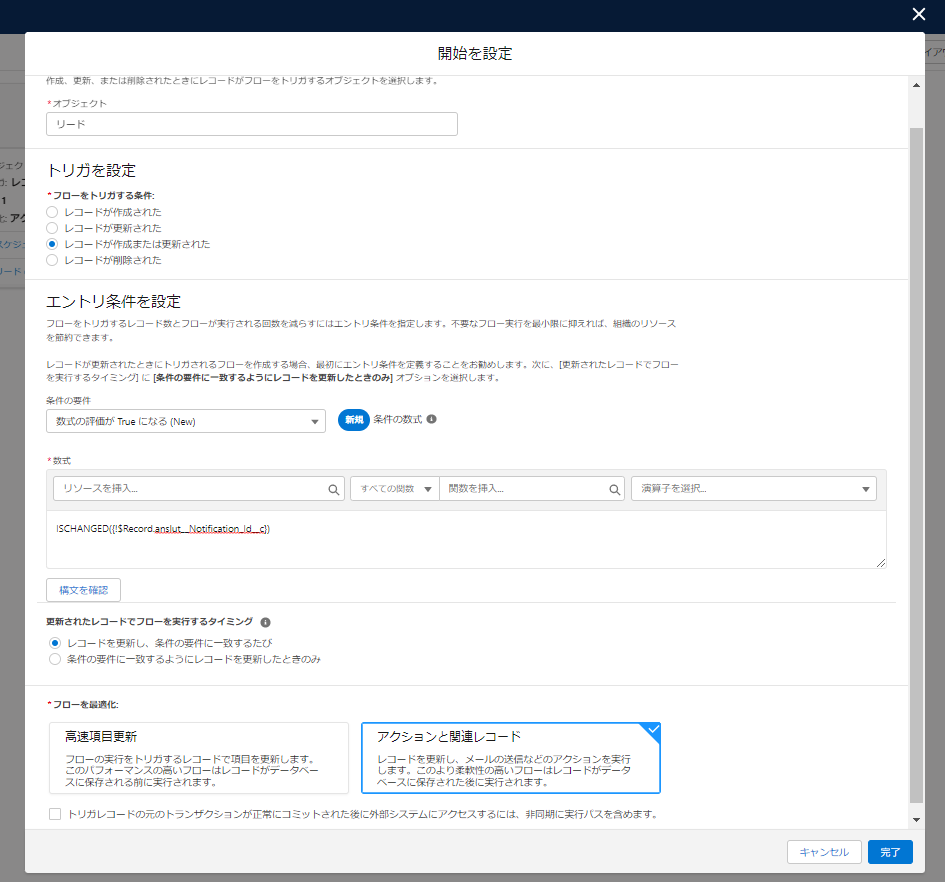
3. 下記のように設定をして、「完了」をクリック
| 設定 | 設定値 |
| オブジェクト | 「送信先オブジェクト」に設定したオブジェクト |
| トリガを設定 | レコードが作成または更新された |
| エントリ条件を設定 | 数式の評価がTrueになる(New) |
| 数式 ※ | ISCHANGED({!$Record.anslut__Notification_Id__c}) |
| 更新されたレコードでフローを実行するタイミング | レコードを更新し、条件の要件に一致するたび |
| フローを最適化 | アクションと関連レコード |
※ [送信先オブジェクト設定]に設定した通知IDのAPI参照名
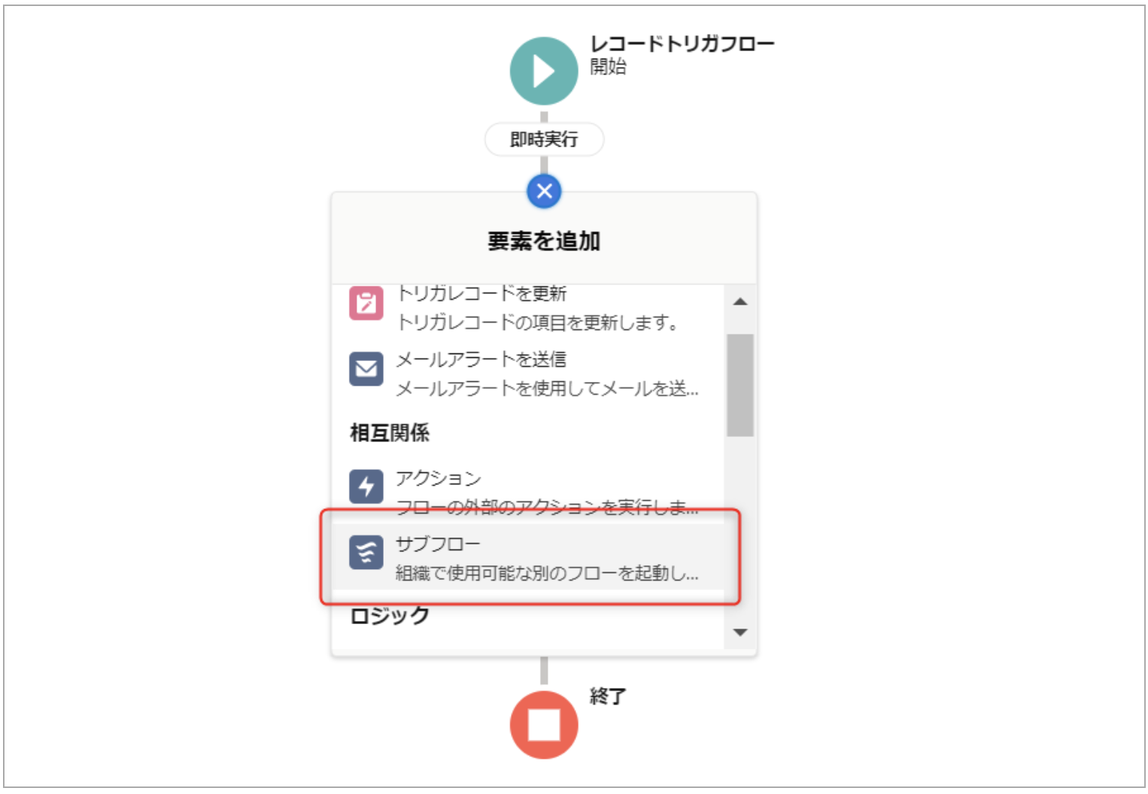
4. 要素「サブフロー 」を選択
5. 参照されるフローにて Send LINER Notificationフローを検索
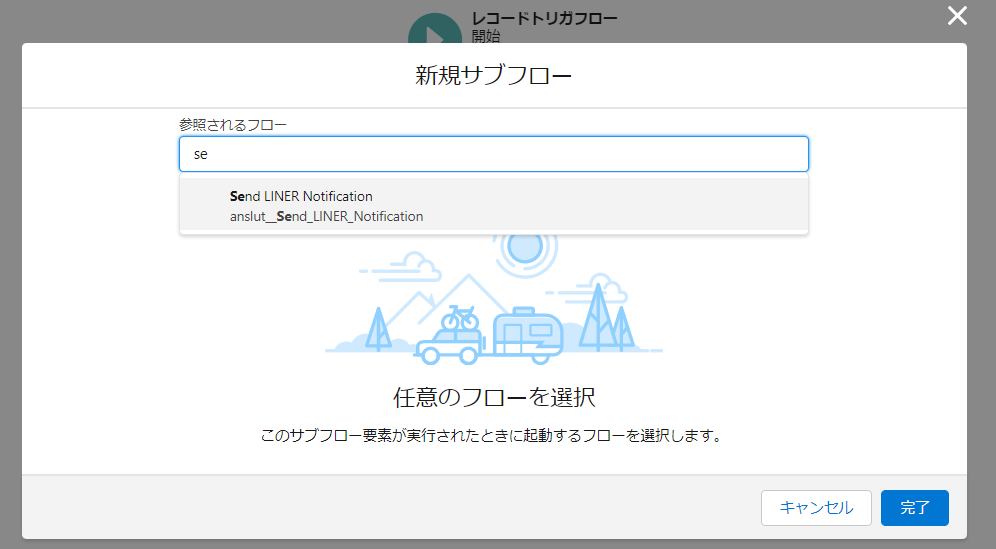
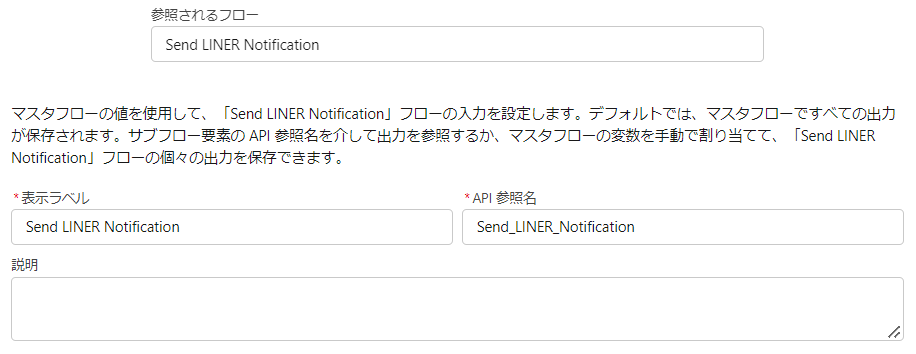
6. 表示ラベルとAPI参照名を任意の値を入力
※表示ラベル・API参照名は任意です。
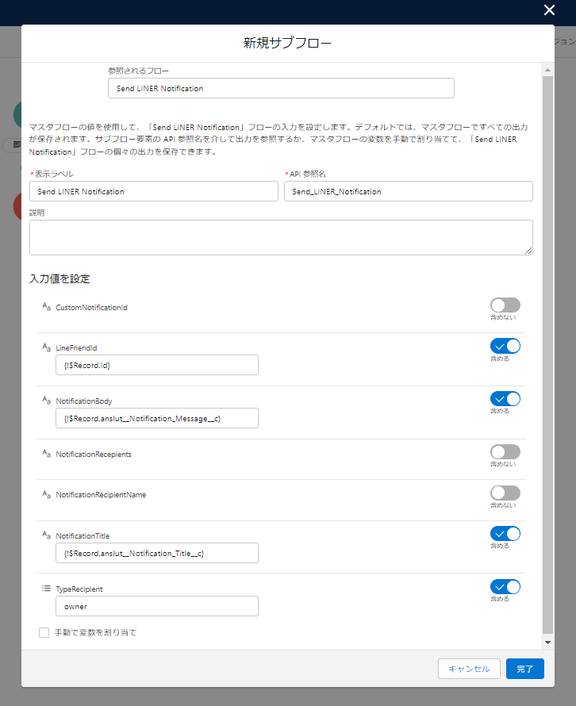
7. 各設定に入力値を設定して、完了をクリック
※サブフローに値を渡すもののみ、「含める」にする
| NO | 設定 | 入力値 | |
| 1 | CustomNotification | – | 含めない |
| 2 | LineFriendId | {!$Record.Id} ※トリガとなるレコードID | 含める |
| 3 | NotificationBody | {!$Record.anslut__Notification_Massage__c} | 含める |
| 4 | NotificationRecipients | – | 含めない |
| 5 | NotificationRecipientName | ユーザ名 or グループ名 TypeRecipientがownerの場合は不要 ※ | – |
| 6 | NotificationTitle | {!$Record.anslut__Notification_Title__c} | 含める |
| 7 | TypeRecipient | owner / user / group ※ | 含める |
5:NotificationRecipientName ※
・ユーザ単位で通知を受け取る場合は、TypeRecipientへuserをセットしユーザ名を入力します
・グループで通知を受け取る場合はTypeRecipientへgroupをセットし、公開グループのグループ名を入力します。
※事前に公開グループの作成が必要となります。
7:TypeRecipient ※
・owner:レコードの所有者に通知されます
・user:指定したユーザに通知されます
・group:指定した公開グループに通知されます。
※所有者ごと、グループごと、個人等、通知先が複数ある通知設定を作成したい場合は、通知先の数分だけ、フローを新規作成してください。
8. 「保存」と有効化を行います。
フローが完成したら右上の[保存]をクリックします
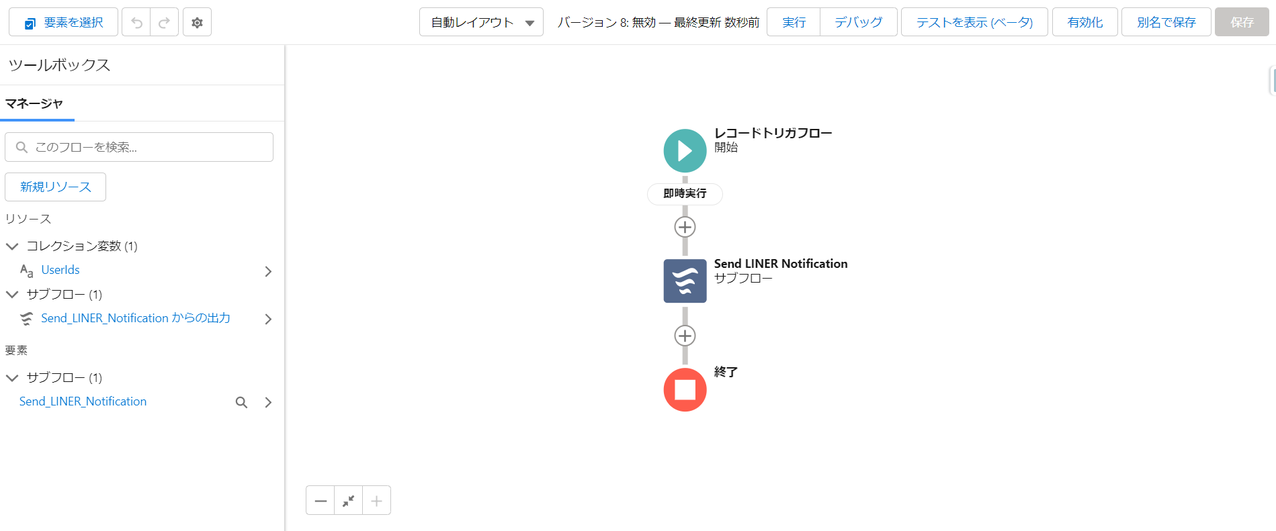
表示ラベル(任意)を入力して保存を行います
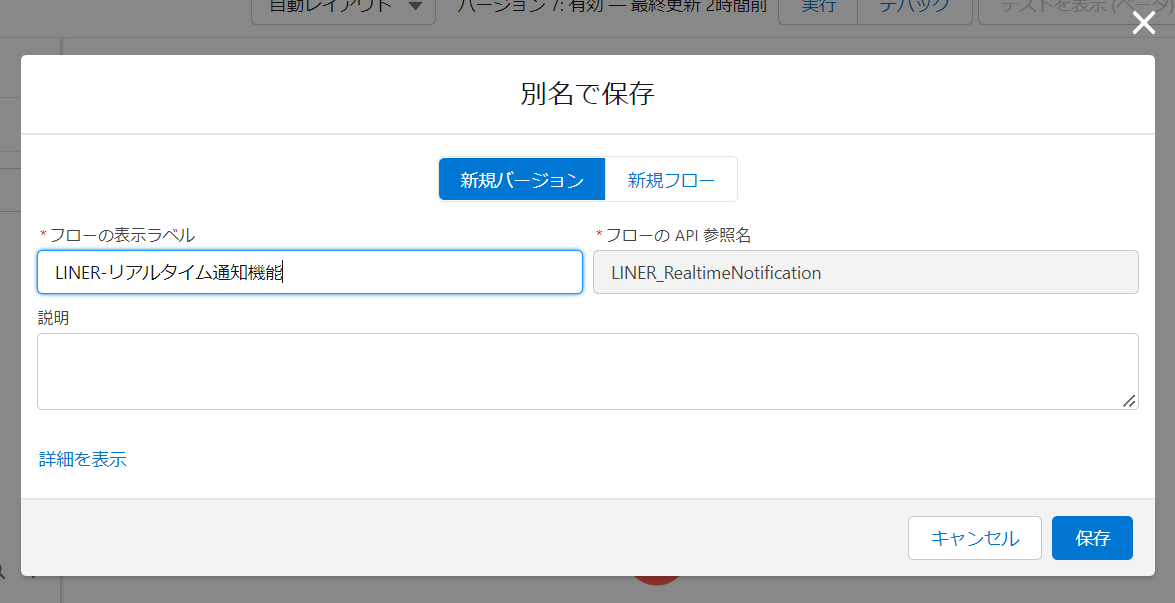
最後に忘れずに有効化をクリックします
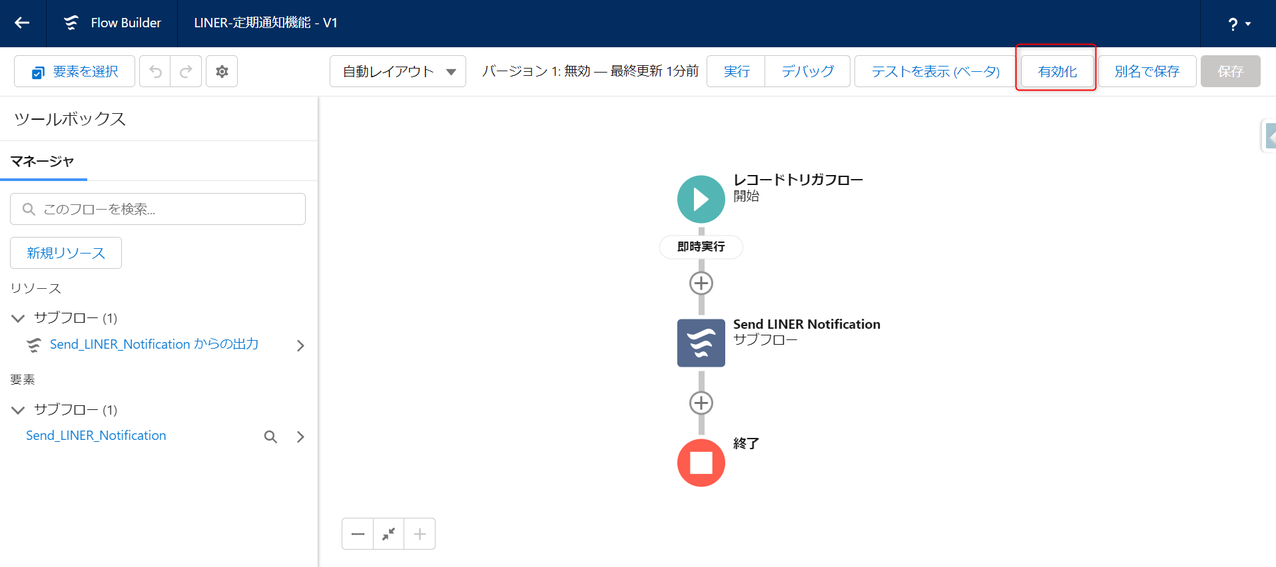
Q1. LINEメッセージ通知をメールで受け取る方法はありますか?
A. 通知をメールで受け取る場合は、メールアラート の設定が必要です。
メールアラート 設定は下記マニュアルをご確認ください。
通知設定:メールアラートを飛ばすための設定
※メールアラート やテンプレート、フローの設定等Salesforce標準機能のサポートは出来かねる場合がございます。ご注意くださいませ。
※本メールアラート設定は「所有者ごとの通知」には対応していないためご注意ください
Q2. 本登録ユーザのLINEメッセージのみ通知を受け取りたい
A. 下記手順でフローを設定いただくことで可能です。
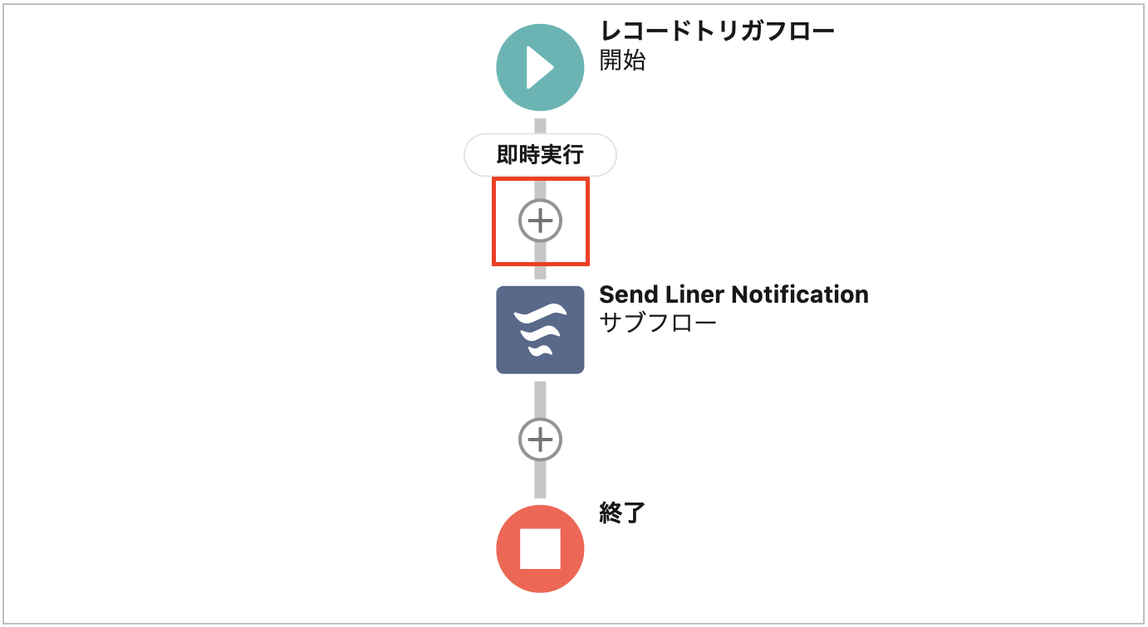
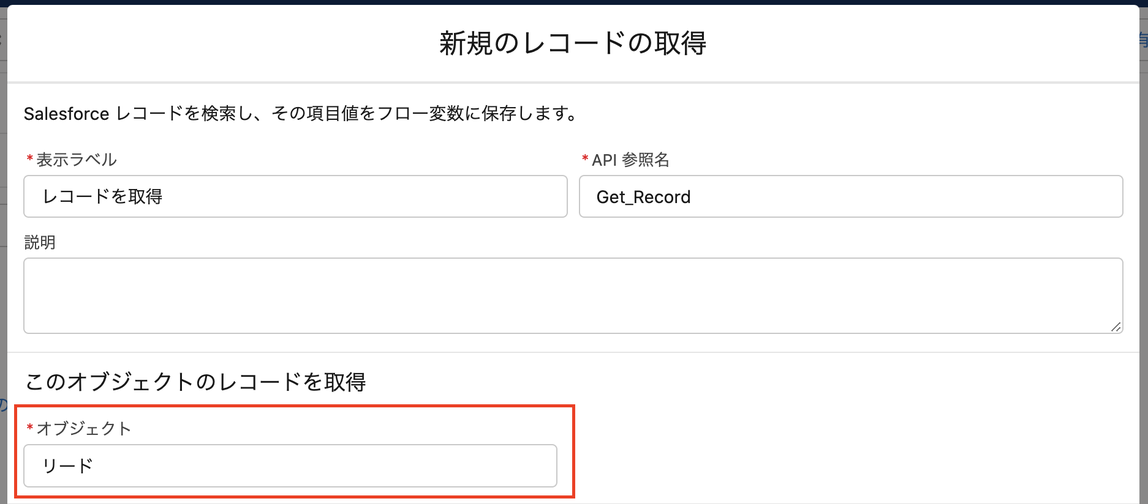
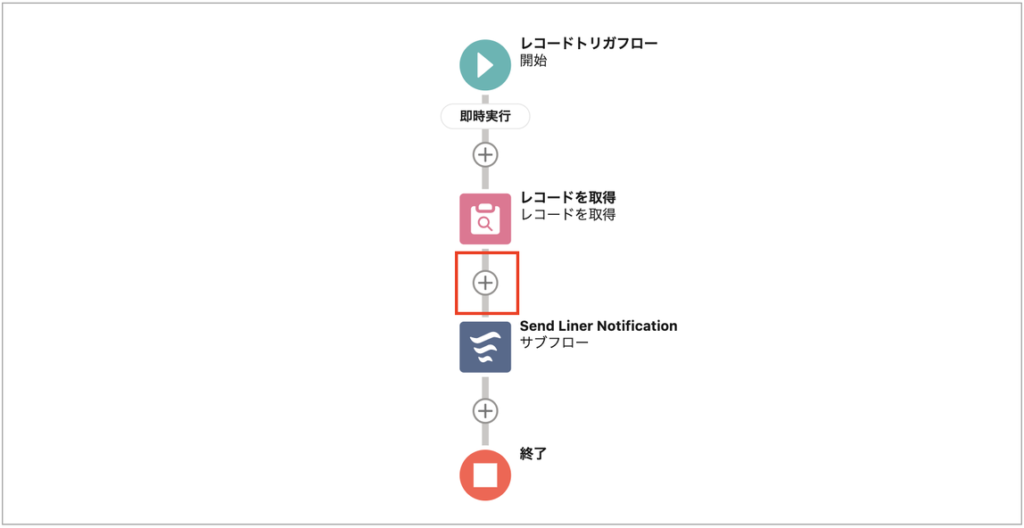
1. まず、本記事に記載の「推奨:定期通知設定」のフローを設定したあとに、下記箇所の[+]をクリックし、レコードの取得をクリックします。
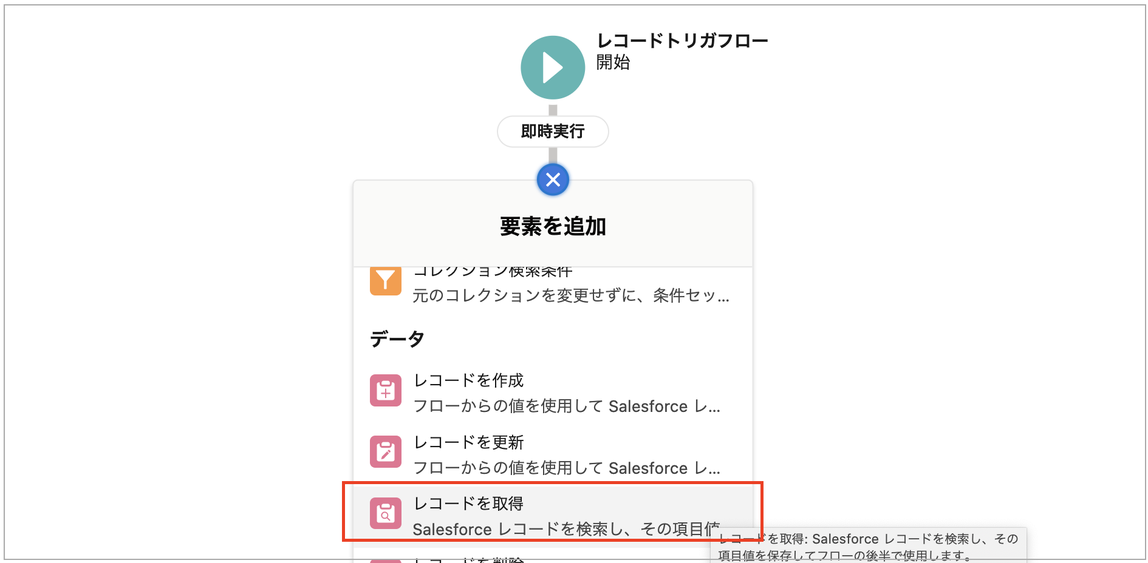
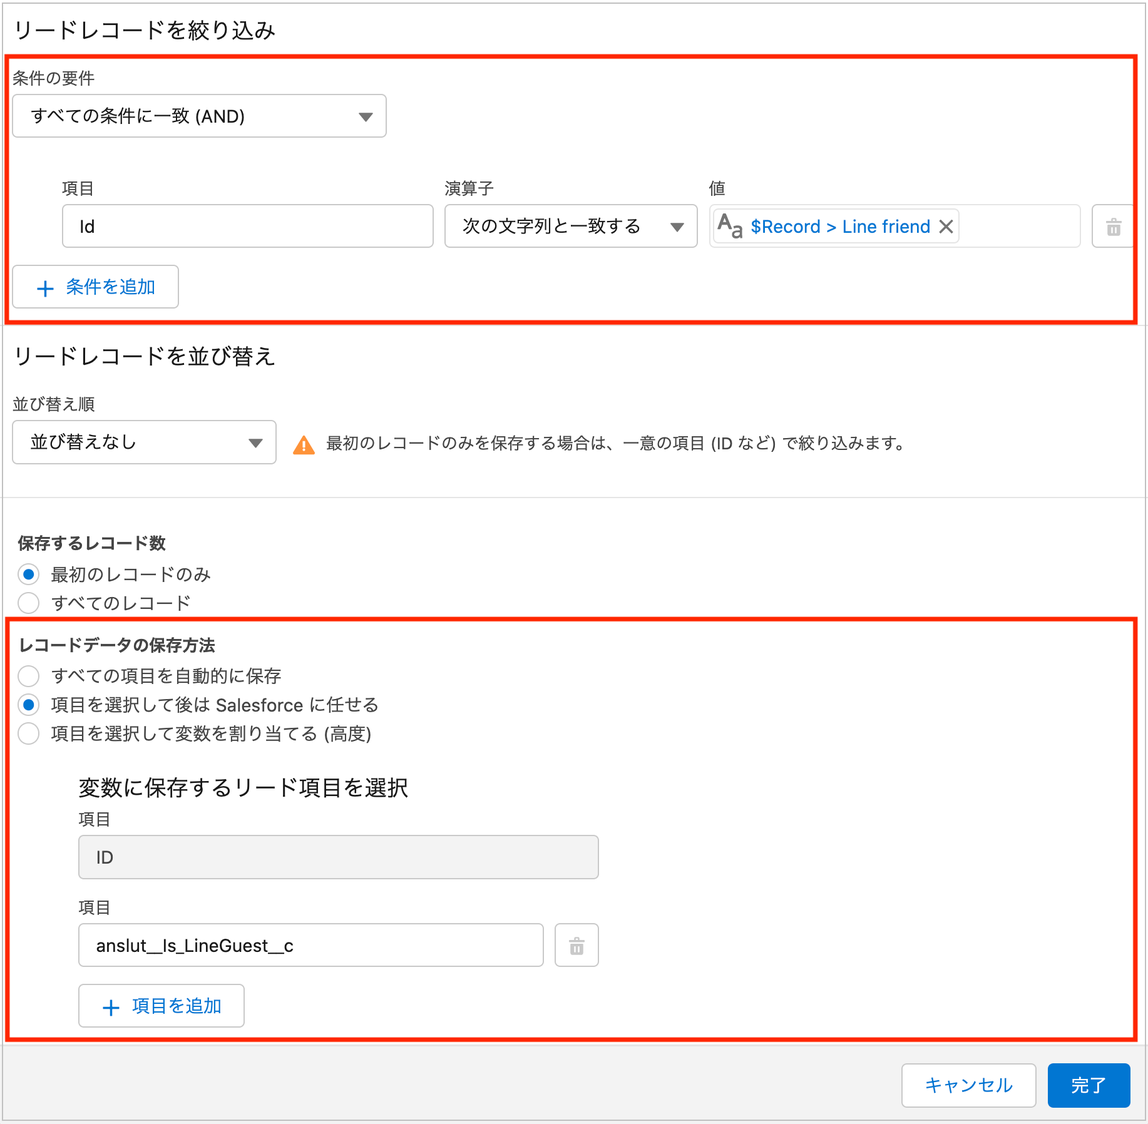
2. 以下条件で設定を行い、[完了]をクリックします
| 設定 | 設定値 |
| 表示ラベル | 任意(例:レコードを取得) |
| API参照名 | 任意(例:Get_Record) |
| 説明 | 任意 |
| オブジェクト ※ | リード/取引先責任者/個人取引先 など |
| 条件の要件 | すべての条件に一致 |
| 項目 | Id |
| 演算子 | 次の文字列と一致する |
| 値 | {!$Record.anslut__Line_friend__c} |
| レコードデータの保存方法 | 項目を選択して後はSalesforceに任せる |
| 項目 | anslut__Is_LineGuest__c |
※オブジェクトは送信先オブジェクトに設定したオブジェクトを利用してください
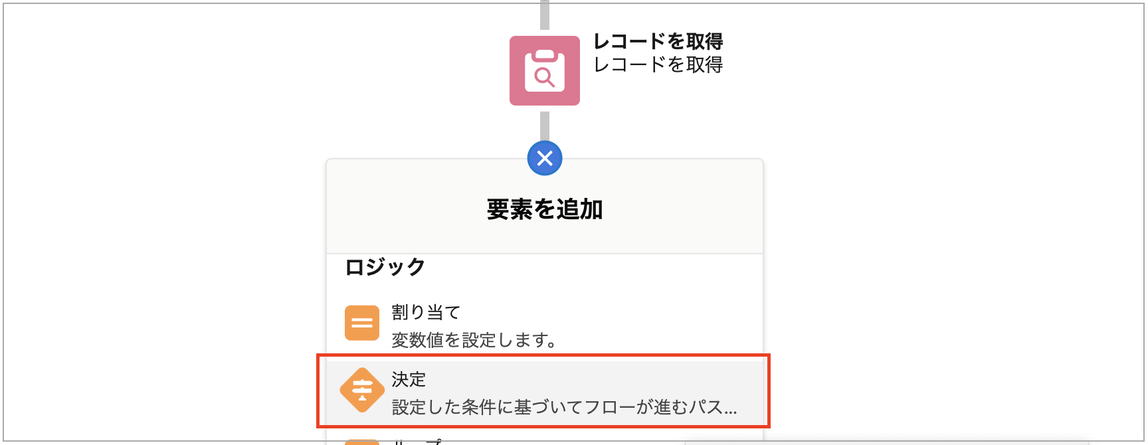
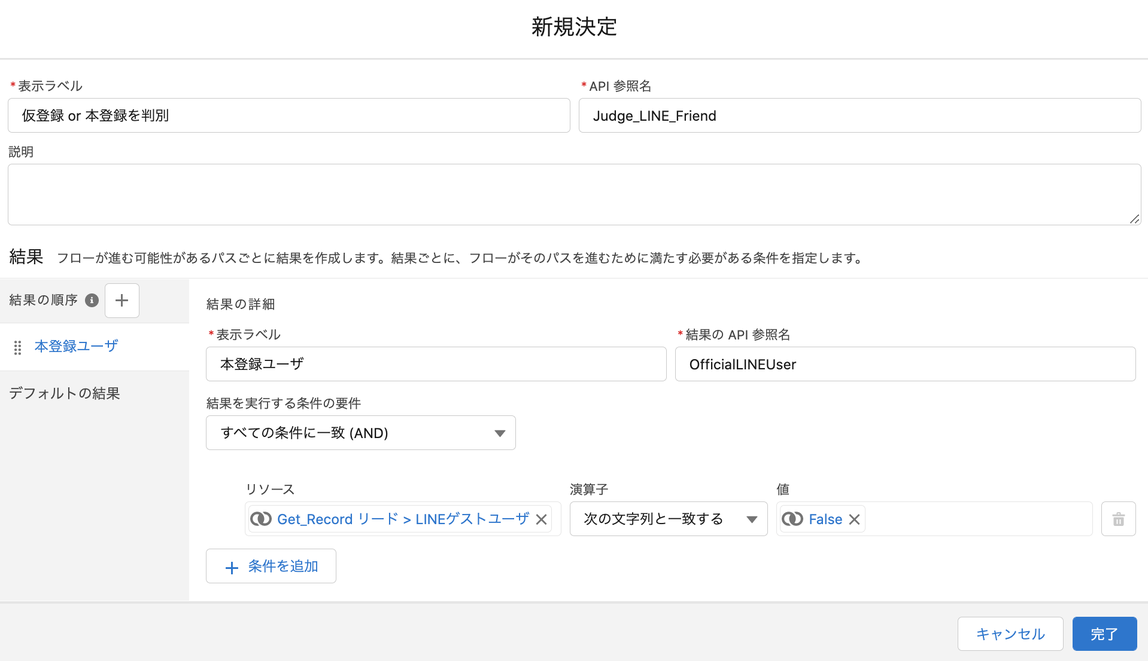
3. レコードを取得の下の[+]を選択し、要素「決定」をクリックします
4. 以下条件を設定し[完了]をクリックします
| 設定 | 設定値 |
| 表示ラベル | 任意(例:仮登録 or 本登録を判別) |
| API参照名 | 任意(例:Judge_LINE_Friend) |
| 結果の詳細表示ラベル | 任意(例:本登録ユーザ) |
| 結果のAPI参照名 | 任意(例:OfficialLINEUser) |
| 結果を実行する条件の要件 | すべての条件に一致(AND) |
| リソース※ | {!Get_Record.anslut__Is_LineGuest__c} |
| 演算子 | 次の文字列と一致する |
| 値 | {!$GlobalConstant.False} |
※Get_Recordの箇所には本設定の2で設定したAPI参照名を設定します。
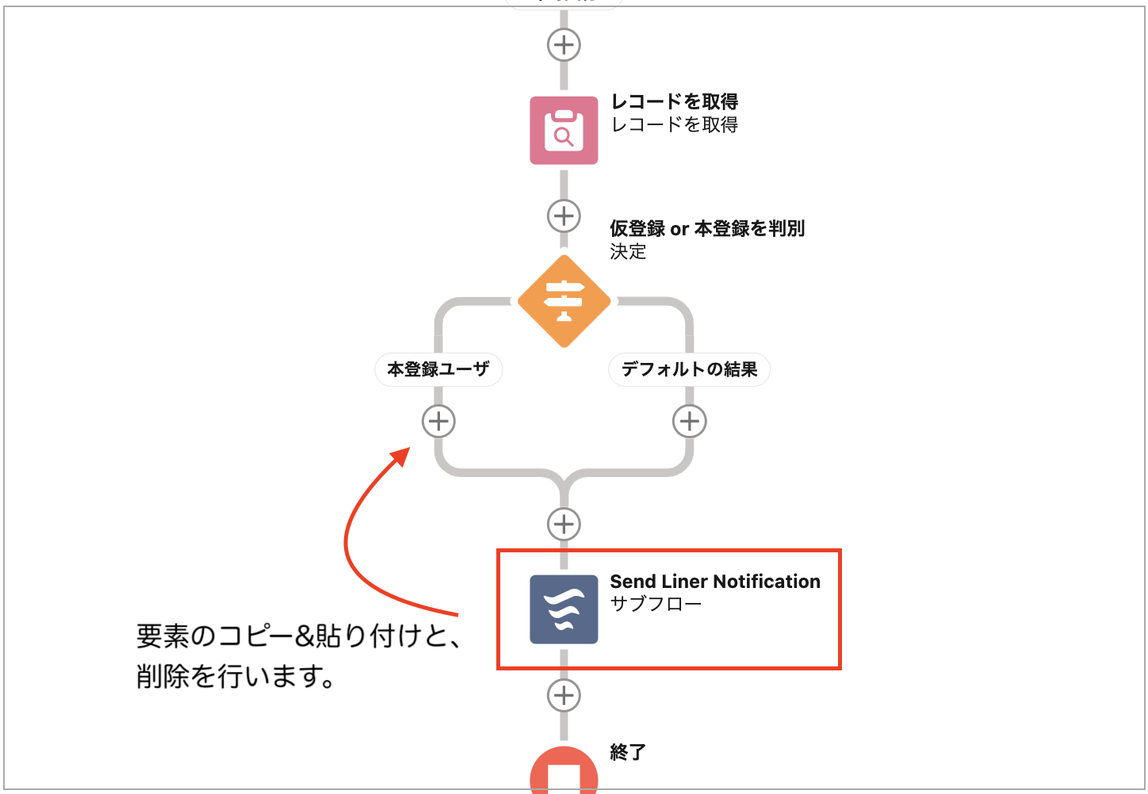
5. 要素[サブフロー]を下記図の通り移動します。
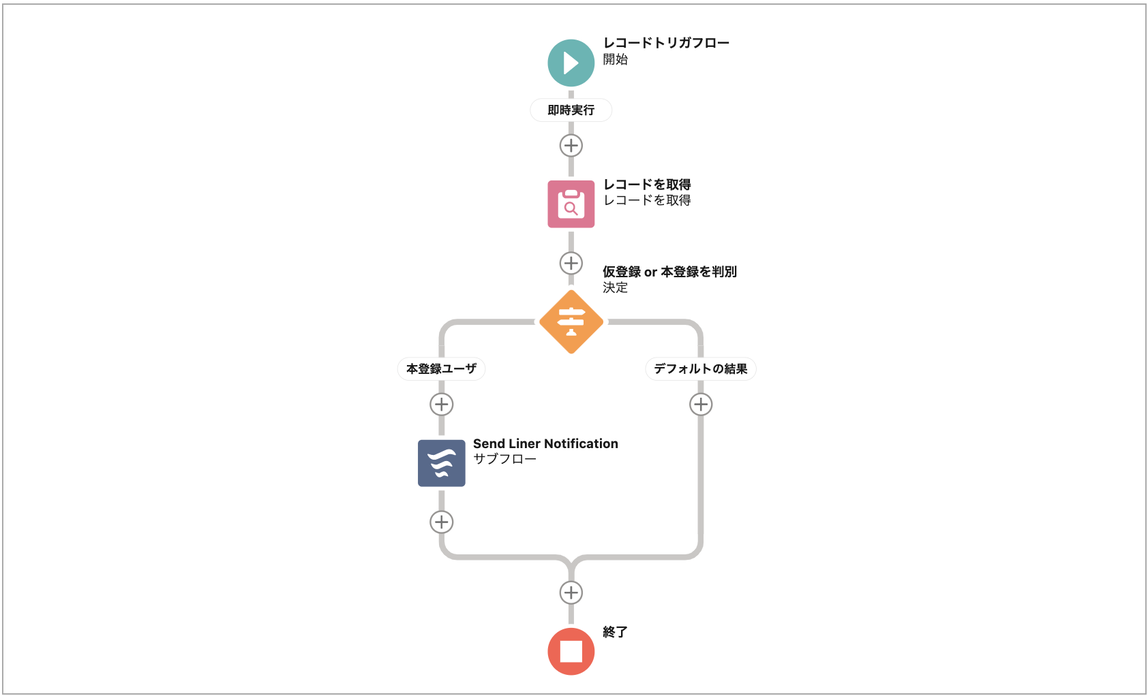
6. フローを下記のように成形したら設定は完了です。[保存]と[有効化]をお願いいたします。
Q3. 公式アカウントごとに通知を出し分けることはできますか?
A. 複数公式アカウントを設定している場合、下記フローを設定いただくことで通知可能です。
[フロー]複数公式アカウントメッセージ受信時の通知(アカウントごとに受信者を設定する)
